meta name="p:domain_verify" content="64879cbe134de85545e2f8c10b95cb65" Books, Art and Teaching: Shapes
Showing posts with label Shapes. Show all posts

Friday, November 29, 2019

FOLLOW THE LINE THROUGH THE HOUSE


To transition from our first trimester unit on line to our second trimester unit on shape we did this project incorporating both elements. I've been wanting to use the cute book by Linda Ljungkvist for awhile, and this lesson was perfect. 


After reading the story students chose geometric shapes to use for a house, planned their composition and glued them with a glue stick. I had different sizes of rectangles, triangles and squares pre-cut for them to choose from. Then they drew details using a sharpie marker. This kept them very engaged, and as always they all came up with interesting stories to go with their pictures!


Saturday, September 14, 2019

Animals


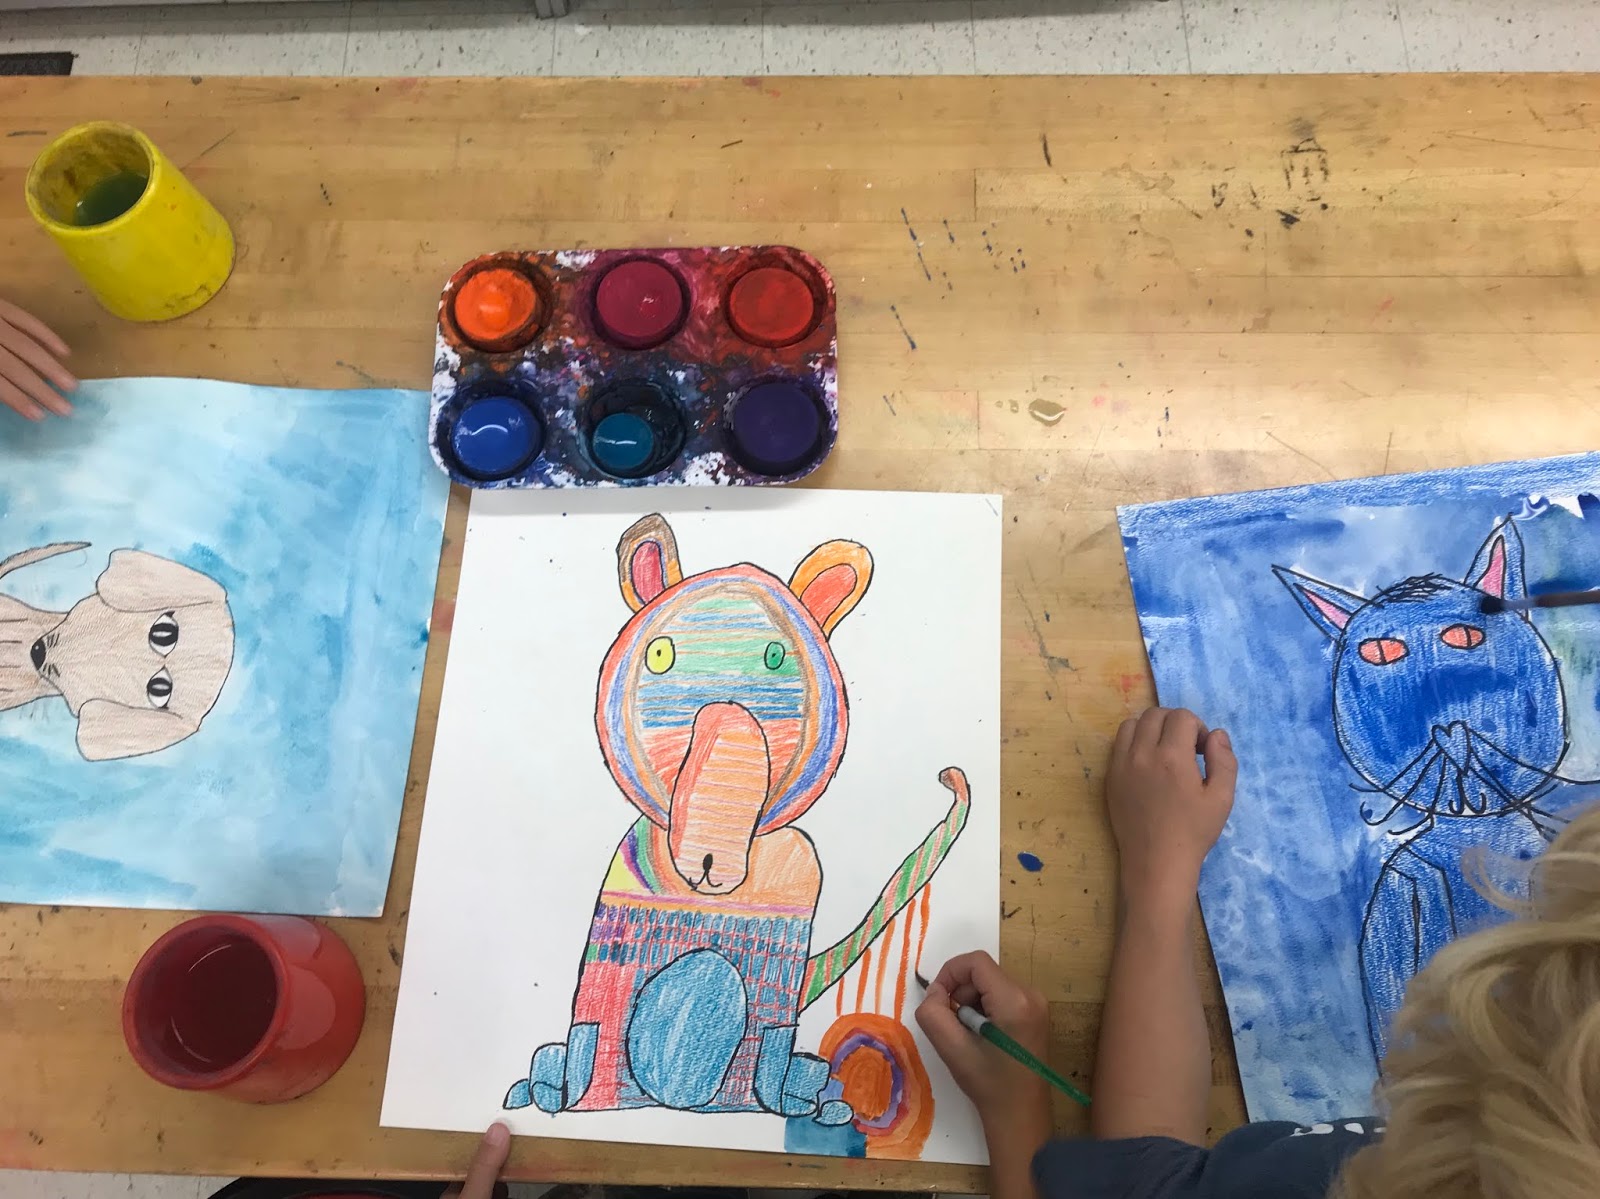
I love these magical animals created by 1st and 2nd graders! We started by looking at animals in art, including "Cat and Bird" by Paul Klee and the many Blue Dog paintings by George Rodrigue.

Day 1 we read THE CAT AND THE BIRD, by Geraldine Elschner which was inspired by Klee's painting. What a great idea for a book! To get started I used instructions on how to draw a simple cat from Kathy Barbo's wonderful website, Art Projects for Kids. We looked at how to use basic shapes, beginning with a circle for the head, to draw a variety of animals. The first day they drew with pencils then outlined with sharpies.


Day 2 we read WHY IS BLUE DOG BLUE, by George Rodrigue, then they went to work adding color to their animals using crayons. Day 3 we looked at more examples of Blue Dog with various backgrounds, then used tempera cakes to finish the backgrounds.


Finally, on Day 4, students wrote titles and descriptions for their animals, which they loved doing! For kids who really struggled with writing I transcribed for them.

Thursday, February 28, 2019

Robot Collages


Students loved making these robot collages! They were inspired by the book, ROBOT ZOT! by Jon Scieszka,  illustrated by David Shannon.  They started by planning their shapes with the tissue paper- I had pieces pre-cut in squares and rectangles, and they cut smaller pieces out of those. They glued them on using glue brushes and liquid starch.


On Day 2 of this project we read another robot book, RABBIT AND ROBOT: THE SLEEPOVER, by Cece Bell. It was another book that had us all speaking in robot voices for the rest of class. They used black and metallic sharpie to add details to their robots, which really brought them to life!


Saturday, February 16, 2019

NOT A BOX and cardboard sculptures

For the first day of this project I started by reading I SPY SHAPES IN ART, by Lucy Micklethwait.  This gives a good introduction to some 3D forms along with a review of 2D shapes in works of art. Each student then chose a large piece of cardboard or mat board as their base, and 2 or 3 geometric shapes I had pre-cut to start their sculpture. They used glue and glue brushes to attach the shapes- I reminded them to count to at least 20 to make sure they stuck. If their pieces wouldn't stick I hot glued them.


For the second day of the project we read NOT A BOX, by Antoinette Portis. My Kindergarten students LOVED this book and the follow up, NOT A STICK, which we read earlier this year. They also had time to add more shapes to their sculpture and paint their sculptures with tempera cakes. Some students added details with markers, string or construction paper too.


They were so creative- here are some of their masterpieces on display:


Monday, February 4, 2019

Valentine's Day & Book Giveaway

Valentine's Day is one of my favorite holidays in the Art room! This simple project starts with my own book, LOVE YOU MORE THAN ANYTHING, and is perfect for 1st grade and Kindergarten. I'll be giving away a copy of my book on Monday, 2/11/19- just comment below to be entered!

Here's the lesson. I begin by reading to everyone on the classroom rug:


Then I demo how to use origami paper to create a heart. Each class gets a different color so that when finished I can create a rainbow display in the hallway. Color coding also makes it easier to pass back art to students later ; )


I draw a big example of how to draw a heart on the fold, and have students check with me before cutting to avoid wasting paper. When they have cut their heart they can create a design, drawing, or message for someone they love using black felt tip marker. If there's enough time I let them make a second one to bring home.

 Sweet and simple!

Here's the beautiful display my volunteer made:

MARGUERITE MAKES A BOOK and Illuminated Letters

As part of our year-long unit on Art History 4th and 5th graders learned about the history of illuminated manuscripts. They began by...